Becoming a crafting artisan means accepting self discipline, working out where you go wrong and reversing the work until it matches the level of good workmanship. That means an exact non-fudging precise cut placed where it needs to be first time. Our willingness to accept change by correction marks the mature craftsman. He sees a failed cut for what it is and doesn’t misname his mistake under the guise of “signature” or “character”. -- paul sellers
how am i just now finding this guy. bad interwebs..
12/12/11
12/5/11
not-so-common knowledge..

these are, hands down, the most difficult tools in my shop. for any of you that may not be familiar with them, they are japanese hand planes or kanna. the name of this blog is a hack of the little japanese i know meaning, 'student of the plane'. i chose the name because my kanna have taught me a great deal about woodworking and how i learn since i've begun to use them.
i purchased the first three from hida tools a little less than a year ago as (from left) an ishihisa joiner plane (nagadai kanna), ishihisa smoother plane (hira kanna), and an additional dai for the smoother cut at a 45deg angle for use on harder woods. the fourth kanna shown is an ebay blade and my first (clumsy) attempt at making my own dai using some left over beech.
kanna are quite simple tools in terms of components and moving parts but incredibly subtle and demanding in setup and use. i am far from the first to make this observation but i seem to be somewhat of a poster child for the difficulties many westerners face trying to tame these tools.
ironically, i managed to fit my first kanna (the ishihisa smoother) to its dai quite well. the blade bedded firmly and had just enough space to facilitate adjustment. i didn't manage to get quite as good a fit with my subsequent attempts however. my 45deg dai will require some shimming as the tsutsumi tripped me up a bit and i was a bit too aggressive removing material from the bed.
obviously, i'm still very much a beginner at setting up and cutting dai. i have nothing of use to share myself other than to point you to those that i've tried to learn from. check out wilbur pan's excellent series of write ups, jay van arsdale's 'japanese handplanes' dvd and toshio odate's 'japanese woodworking tools, tradition and spirit'.
just as i sat down to show you my kanna (O.o) and discuss my experiences with them, chris hall released the first entry of a series titled, 'smile and wave'. i decided to wait because he was addressing the sole conditioning of a kanna to be used for truing. he was challenging the traditional (well, traditional to the west..) method of conditioning with promises of a 'better way'.
this immediately caught my attention as i've never been able to get my nagadai kanna to perform satisfactorily. i had conditioned the sole in the 'traditional' manner and the plane was extremely difficult to use. i had to extend the blade quite a bit to even get it to engage the work and when it did, it would 'dive' into the board and take an overly thick shaving. additionally, if i worked at either end of the board i was clearly creating a convex surface as the plane would rise up the beginning of the board and drop off the end following the contour of the sole.
having recently flattened the tops of two new workbenches, i'd had plenty of opportunity to fuss and fiddle with my nagadai kanna but eventually i would have to give up and grab my veritas #7 to get the work done. i was all but convinced that my blade wasn't sharp enough (though clearly my others were) or i hadn't bedded the blade correctly, etc..
chris's series explains quite thoroughly why the behavior i'd observed is exactly what should be expected from my sole configuration. he spends four posts explaining why it won't work. in the fifth and final post (seriously, the wait was killing me..) he explains the 'correct' way to condition a kanna sole for truing.
the solution was both liberating and frustrating at the same time. encouraging because i'm looking forward to reconditioning my sole chris' way and see if i can finally make good use of my nagadai kanna for truing. frustrating because i suspected the damn solution the entire time. see the comment i left on chris' first post in the series. i had the answer, though i over estimated the importance of reducing friction..
it's frustrating because i saw a potential solution to my problem and never gave it a shot. i don't yet have the faith in my skills to dismiss what i understand as 'common knowledge' in favor of conclusions i reach through my own experiences and discoveries.
i'll get there eventually. i've been through enough learning curves to recognize that it's normal. you have to start with wisdom that's passed to you while you build up your own experience to draw from. it'll come in fits and starts. you'll make mistakes between trusting what you've been taught and that which you've learned.
enjoy the process. i am..
11/27/11
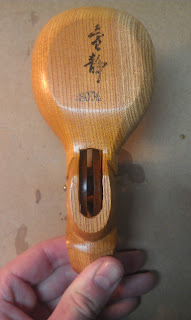
who's the masta?
sho'nuff? perhaps. is he the latest master level member of chuck bender's No BS School of Woodworking? don't think so. who is?!?
-> this guy <-
kiss my converse..
11/22/11
suma what?!?
remember when you were a kid, you'd do something stupid and blame it on your friends? your mom would ask, 'if all your friends jumped off the golden gate bridge would YOU?'
my mom never asked that question. she knew i was the friend talking you into it.
so here's my latest bridge..

i first read about the sumitsubo in toshio odate's, Japanese Woodworking Tools: Their Tradition, Spirit and Use, which if you're new to all this, is pretty much 'the book' on japanese tools. the sumitsubo seemed to me at the time, both messy and complicated. look at the fingers of a japanese carpenter and compare the load of gear above to a pencil and i'm sure you'll agree. i 'couldn't hear jimmy' at the time (first to name the reference in the comments gets cool kid pts.) and dismissed the sumitsubo as a quaint tool of antiquity.
then i got jay van arsdale's Connections dvd a month or so ago. i'm hoping to get to a full review of this dvd soon but he spends a good bit of time talking about the sumitsubo, it's advantages over pens/pencils, etc.. watching him use it made it seem like a lot of fun and i'm willing to put up with a little mess for a good bit of fun and an interesting learning curve. that's why i work wood in the first place..
so, i ordered up the gear shown above from hida tools. i'd offer a linked list of the above but their website makes that difficult. clockwise from left..
tsubosei brand wood sumitsubo 180mm $64.10
takumi brand silk line .25mm 1.70
karuko pin (oak, kind of hidden in pic) 2.60
takumi brand black ink 160cc 7.90
bamboo sumisashi (pk of 2) 4.80
takumi brand raw silk sumiwata 3.30
total: $84.40
not sure i should have added that up. don't know about you but i bet i can get a MOTHER of a mechanical pencil for $84.40 ;). there are far cheaper, plastic options that can easily save you $50 here but i enjoy beautiful things on my bench.
so here's a not-so-brief walk through of me trying to put this thing together..
here are a couple of shots of the sumitsubo out of the box..


i always like to start by reading the instructions..

of course, i don't read japanese so i decided that they weren't in fact instructions, but a charming little shinto poem imploring the spirit within the sumitsubo to cut down on my layout errors. emboldened by the spirit's benevolence and referring to toshio's advice in his fore mentioned tome, i charged on..
i soaked the silk wadding in water..

wrung it out and arranged it into a shape roughly twice the size of the sumitsubo's ink pot..
arranged half of the wadding within the ink pot, then fed the silk line through the grommet shown at the top of the sumitsubo, over the wadding and through the grommet on the wheel side of the ink pot..

i then attached the line to the wheel (as you would attach fishing line to a reel - toshio) and wrapped up all but about 2' of the line on the wheel. then i saturated the first half of the wadding with sumi ink.

i tucked the rest of the wadding into the ink pot, sandwiching the line between the two halves and saturated the top half of the wadding with the ink as well.

here's the glamour shot.

i removed the sumisashi from the packaging. there are two, this one felt more ninja..

i shaped each end of the sumisashi (chisel left, hammer mashing on the right), dabbed the ends in the ink pot and took her for a spin. cool eh?

pretty sure i'm going to have a lot of fun playing with this. i'll post again after i've had some time with it. happy to field any questions or comments.
now, go explain this one to your mom..
my mom never asked that question. she knew i was the friend talking you into it.
so here's my latest bridge..

i first read about the sumitsubo in toshio odate's, Japanese Woodworking Tools: Their Tradition, Spirit and Use, which if you're new to all this, is pretty much 'the book' on japanese tools. the sumitsubo seemed to me at the time, both messy and complicated. look at the fingers of a japanese carpenter and compare the load of gear above to a pencil and i'm sure you'll agree. i 'couldn't hear jimmy' at the time (first to name the reference in the comments gets cool kid pts.) and dismissed the sumitsubo as a quaint tool of antiquity.
then i got jay van arsdale's Connections dvd a month or so ago. i'm hoping to get to a full review of this dvd soon but he spends a good bit of time talking about the sumitsubo, it's advantages over pens/pencils, etc.. watching him use it made it seem like a lot of fun and i'm willing to put up with a little mess for a good bit of fun and an interesting learning curve. that's why i work wood in the first place..
so, i ordered up the gear shown above from hida tools. i'd offer a linked list of the above but their website makes that difficult. clockwise from left..
tsubosei brand wood sumitsubo 180mm $64.10
takumi brand silk line .25mm 1.70
karuko pin (oak, kind of hidden in pic) 2.60
takumi brand black ink 160cc 7.90
bamboo sumisashi (pk of 2) 4.80
takumi brand raw silk sumiwata 3.30
total: $84.40
not sure i should have added that up. don't know about you but i bet i can get a MOTHER of a mechanical pencil for $84.40 ;). there are far cheaper, plastic options that can easily save you $50 here but i enjoy beautiful things on my bench.
so here's a not-so-brief walk through of me trying to put this thing together..
here are a couple of shots of the sumitsubo out of the box..


i always like to start by reading the instructions..

of course, i don't read japanese so i decided that they weren't in fact instructions, but a charming little shinto poem imploring the spirit within the sumitsubo to cut down on my layout errors. emboldened by the spirit's benevolence and referring to toshio's advice in his fore mentioned tome, i charged on..
i soaked the silk wadding in water..

wrung it out and arranged it into a shape roughly twice the size of the sumitsubo's ink pot..
 |
| Add caption |

i then attached the line to the wheel (as you would attach fishing line to a reel - toshio) and wrapped up all but about 2' of the line on the wheel. then i saturated the first half of the wadding with sumi ink.

i tucked the rest of the wadding into the ink pot, sandwiching the line between the two halves and saturated the top half of the wadding with the ink as well.

here's the glamour shot.

i removed the sumisashi from the packaging. there are two, this one felt more ninja..

i shaped each end of the sumisashi (chisel left, hammer mashing on the right), dabbed the ends in the ink pot and took her for a spin. cool eh?

pretty sure i'm going to have a lot of fun playing with this. i'll post again after i've had some time with it. happy to field any questions or comments.
now, go explain this one to your mom..
11/20/11
my workspaces
i started, as many modern woodworkers do, working in the garage. i staked my claim to one stall of our three car garage and tried to come up with some sort of workflow that allowed enough room for me, my machines, wood and my current projects.
then, about a year ago, i got turned on to hand tools. yes, i'm one of 'them'. feel free to leave mocking comments ;).
i began to accumulate hand tools and quickly found my existing workbench impossible to work with. it had pretty much failed with power tools as well but i'd managed to 'make do' so far. i read everything i could find on workbench design (schwarz, landis, odate, etc..) and decided to build a nicholson. i'll do another post on the how's/why's but i managed to make space in my 'shop' for the new bench and was quite happy.
until june..
working in the garage in colorado is wonderful in the spring and fall but winters are cold and my west facing garage made summer time unbearable. in the past, i'd simply avoided woodworking during those times but i was far too stoked to take an extended break and i was in the middle of several projects that i didn't want to postpone.
inspired by tom fidgen's experiences as related in his wonderful book, Made by Hand, i decided to build a hand tool area in my basement and dedicate the garage space to machine work. of course, my nicholson wouldn't fit down the stairs so i had to build another bench, a roubo, for the basement. i tacked up some paneling (which i don't like, plan to replace..) and built another tool shelf.
the new space clearly isn't finished yet but it's usable and i'm looking forward to be able to work through the winter in comfort. there have been days where i've made more trips than i'd have liked from one area to the other to grab a tool/pencil/square/etc. but that's diminishing as i settle into the new workflow.
as many others have done, i try to use the machines for the rough work (milling, dimensioning) and do the fine work (layout, joinery, finishing) in the hand shop. it's still a new process for me but i'm happy with it so far.
here's a pic of the garage area before i built the basement area. i'll clean up and post a current one soon..

here's a shot of the basement as it sits now..

thanks for reading and i'd be more than happy to answer any questions.
mom's cabinet
a little late to really call this a build thread but i thought i'd catch you up on my current project. this is a small cabinet i'm trying to get done for my mom for christmas.


there are a couple of firsts for me with this project. this is the first time i've worked with a spalted wood, this being maple. i found it crumbled quite easily during planing and sanding but i finally came up with a surface i'm happy with.
this is also the first project i'll be giving to someone where i cut the dovetails by hand. they came out pretty well but i'll wait until i've applied the oil before deciding if some hand cut moldings will be added to the effort ;)..
here's a pic as i'm ready to glue up the frame and panel door..
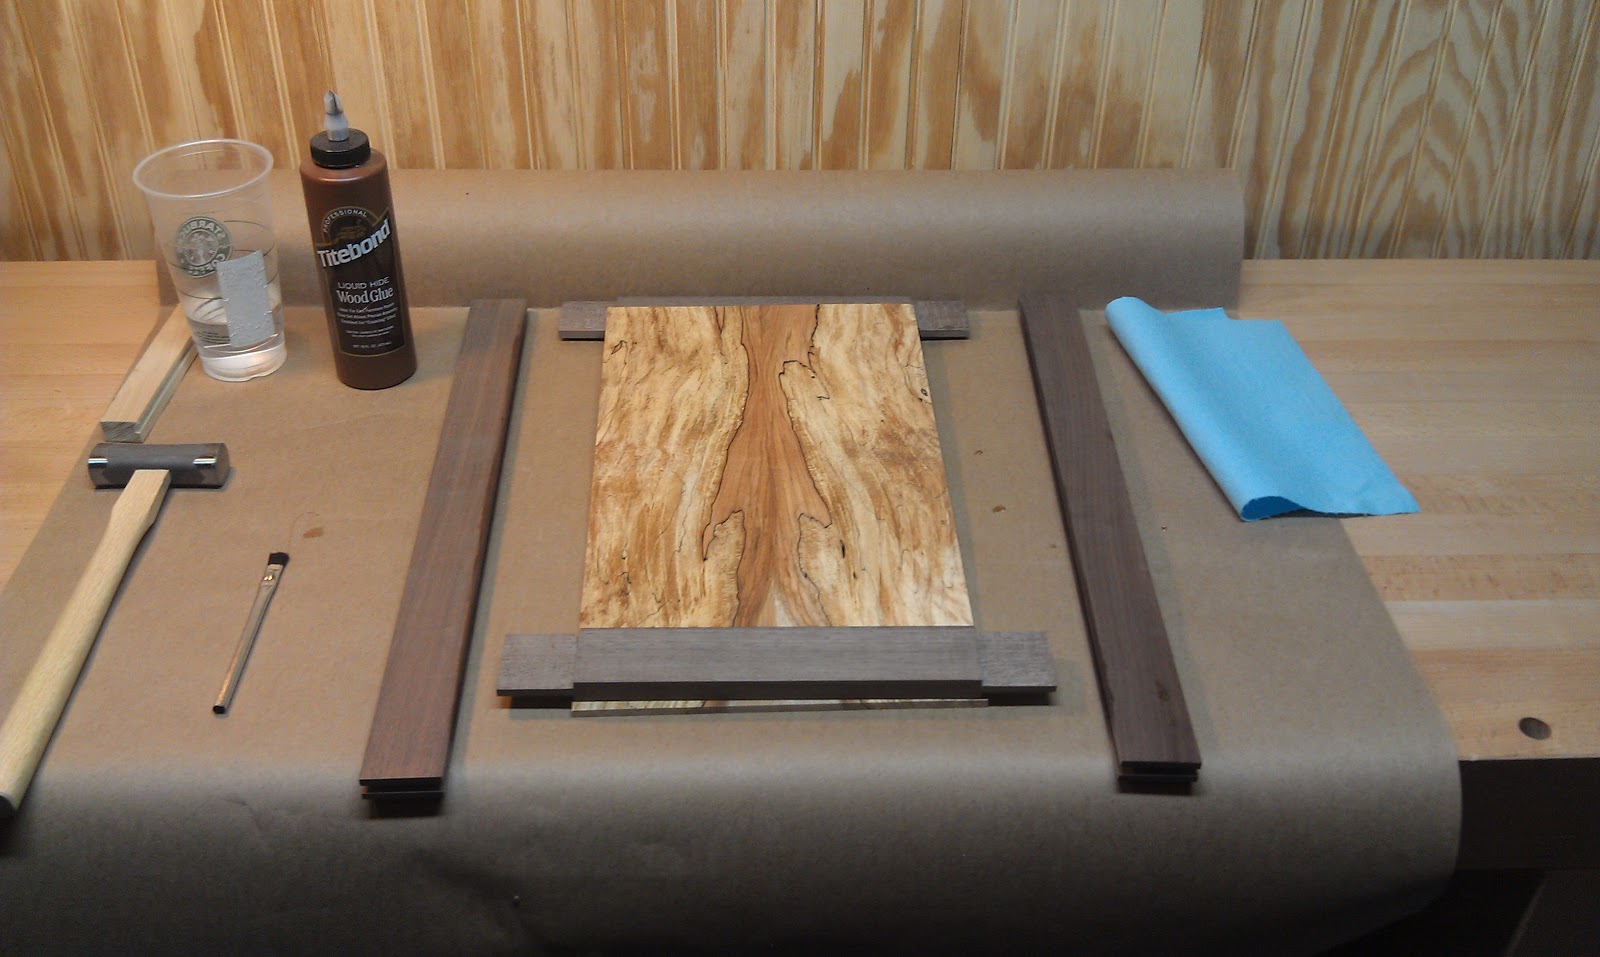
and another with the cabinet..

thanks for reading. comments, questions and suggestions for content are always welcome.
11/19/11
printf('hello world!');

i'm going to blame everything on this damn rock. i've successfully resisted the urge to create yet another woodworking blog for a few years now. there are so many out there, i couldn't bring myself to add to the noise. i don't have anything to contribute in the way of knowledge or technique. i haven't recently emerged from an enlightening apprenticeship with a master temple builder or hungarian cabinetmaker. even my experiences are adequately covered by established bloggers.
for example.. bob rozaieski (see? first post and i'm already name dropping..) covered the building of, and his experiences with his nicholson bench quite thoroughly. mine turned out a little differently (benefiting from some of his experiences in fact) and some of the tools and techniques i used were different because i have different preferences. but as much as i wanted to share the experience and my shiny new bench, i didn't want to have a 'me too!' blog that clogged up a bunch of readers with tired content.
then today i found this gorgeous rock on my doorstep. i brought it inside and unwrapped it like it was christmas morning. i showed it to my very understanding wife and explained to her that it was dug out of a mine near kyoto, japan where it had lived for millions of years before being dug up, shaped and sent to my doorstep in the blink of an eye.
two things happened..
first, i was filled with an urge to share this rock with everyone i knew. second, i realized i didn't feel comfortable with my knowledge of how to care for a natural waterstone. i don't want to be the knucklehead that destroys this beautiful creation of natural forces and geologic time because i'm excited to play with my latest bright, shiny object.
i've found a bit of info on their care in archived forum posts and the stone even came with some brief, non-specific instructions but i'm still a little hesitant. specifically, i want some reassurance that the solvents in 'lacquer or varnish' won't destroy or weaken the stone when i 'apply several coats to the sides and base of the stone' as the instructions indicate. lacquer can mean something quite different in japan than it typically does here. when i hear 'lacquer', i start looking for a can of deft and i have a feeling shellac might be a better idea..
it's usually around this point that i head off to ask my question in a forum but forum questions require context and the relevant audience. there aren't that many people using natural waterstones today and i suspect that number is dropping as they become harder and harder to come by.
so i sent off an email to jay van arsdale hoping that he might find the time to answer a question that i'm sure he's heard a thousand times. there are a few other woodworkers i really enjoy that are likely to have some ideas as well but it was jay's kanna dvd that gave me the final push to try natural waterstones in the first place.. so i figured it was his turn ;).
when i was done i came back to the same idea, 'i really ought to start a blog..'
my intent then is that this blog will allow me to provide a good amount of context for all the silly little questions i come up with, the goofy, tangential discoveries i make, and the treasures i find and create. it will also, i'm hoping, find an audience with similar interests that might be entertained in exchange for the occasional observation or bit of advice they might care to share.
so it begins.. a pleasure to meet you all..
Subscribe to:
Posts (Atom)